SMS Logiq Technical Configuration
Integration Overview
The SMS Logiq Integration for Genesys Cloud in New Zealand comprises of 2 main components. the Middleware Integration and the optional Client Integration.
Middleware Integration
Create Role
- Create the following Role
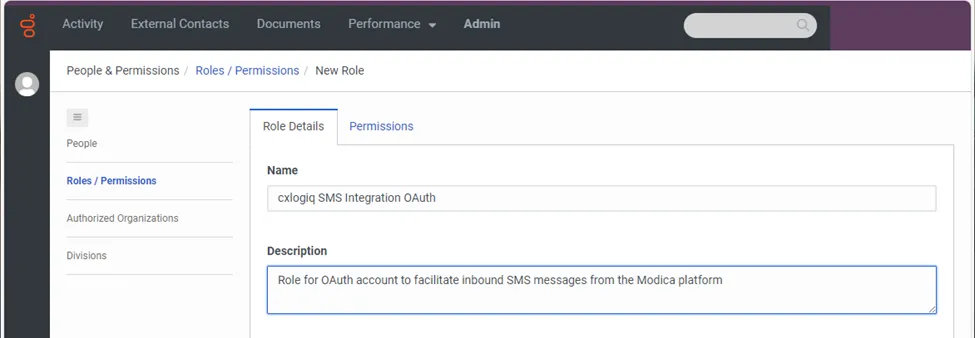
- Assign the Conversation > Message > All Permissions permission to the new role

- Save
Note: The user who will be creating the OAuth will need to have this Role assigned so that it is available in the OAuth Roles list to assign to the OAuth account we create
Create OAuth
- Create the following Client Credentials OAuth
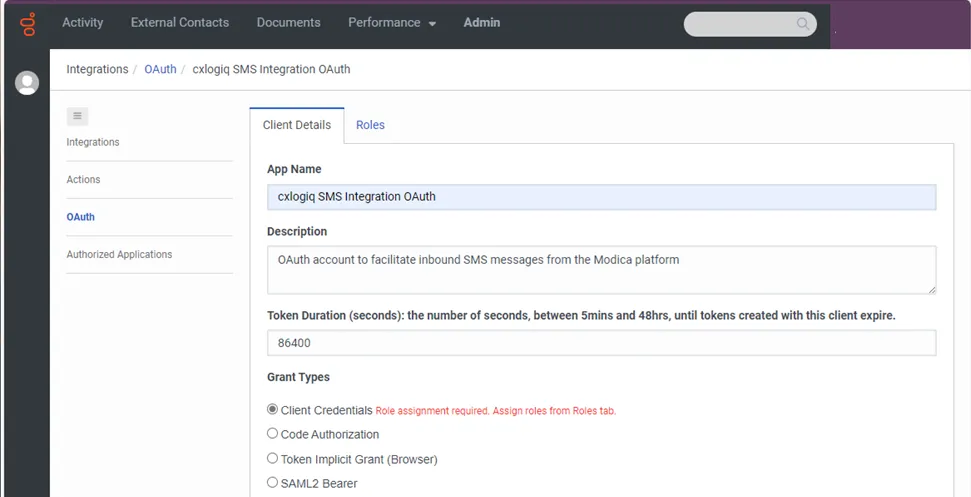
- Assign the Role created above to the OAuth
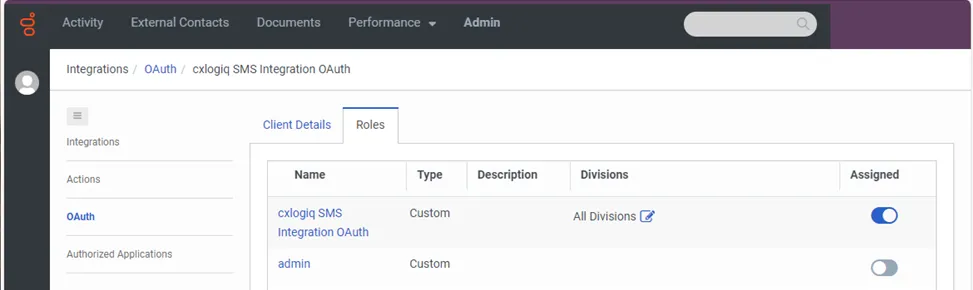
Note: Assign the appropriate Division(s) to this role. These should align with the Divisional assignments of the Queue(s) and Users(s) that will be using SMS Logiq
- Save
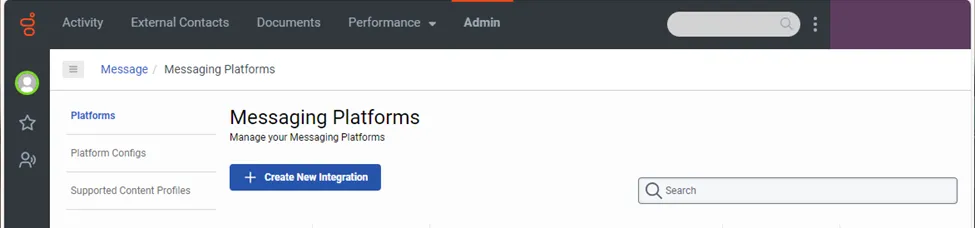
Open Messaging Integration
- Under Platforms select the button to +Create a New Integration
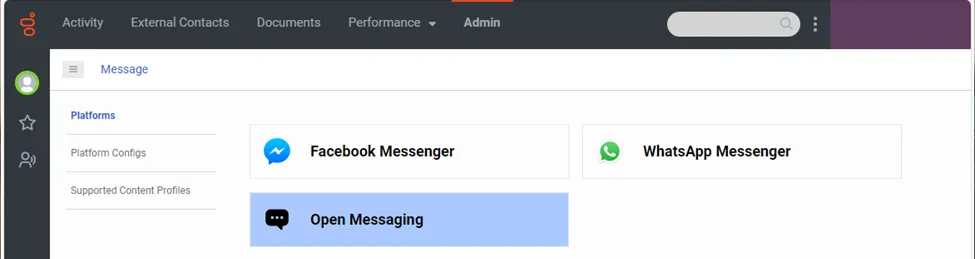
- Select Open Messaging
-
Under the Name field, enter Modica SMS
-
Under the Outbound Notification Webhook URL enter
https:// then your orgName followed by -modica.azurewebsites.net/api/outbound
e.g.: https://yourOrgNamegoesHere-modica.azurewebsites.net/api/outbound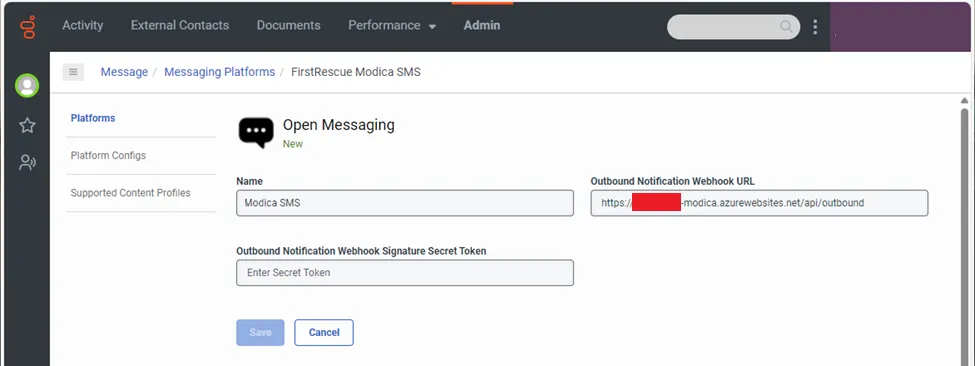
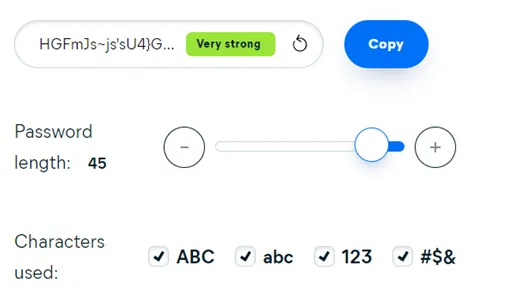
- Generate a 45+ character password string and enter in the Outbound Notification WebHook Signature Secret Token
-
Save the Integration & exit
-
Re-open the Integration & get the Integration Id from the URL

Queue
- Create a test Queue and assign Test Users
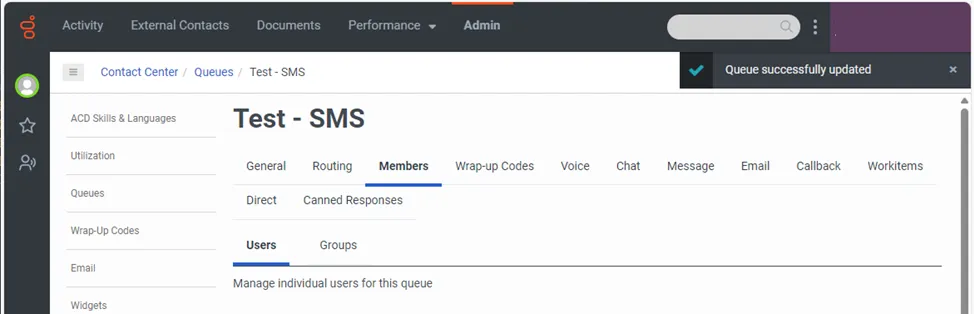
- On the Message tab. Select the Integration from the Outbound Open Messaging Integration dropdown
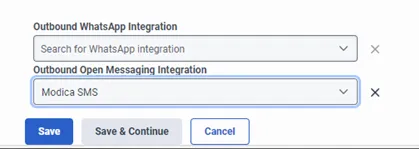
- Save
Flow
- Create a test Flow and transfer to the new Test Queue created above
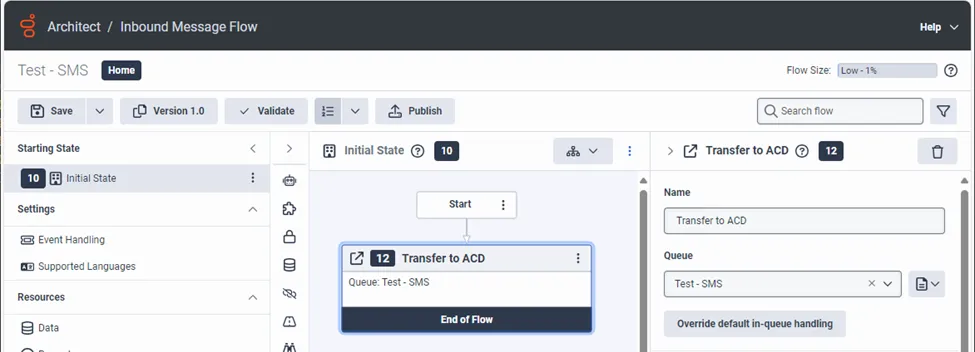
- Save and Publish
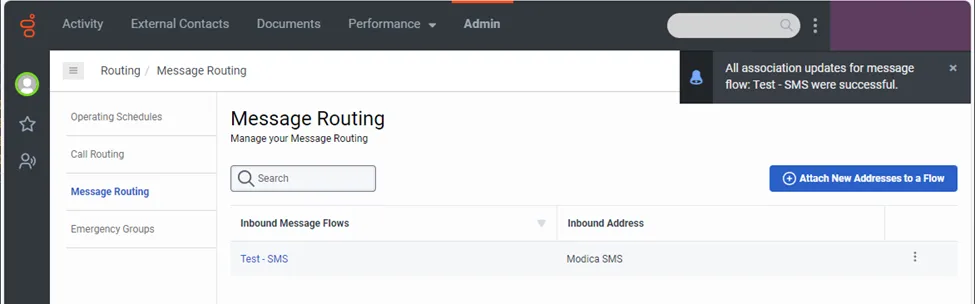
Flow Assignment
- Under Message Routing select +Attach New Address to a Flow
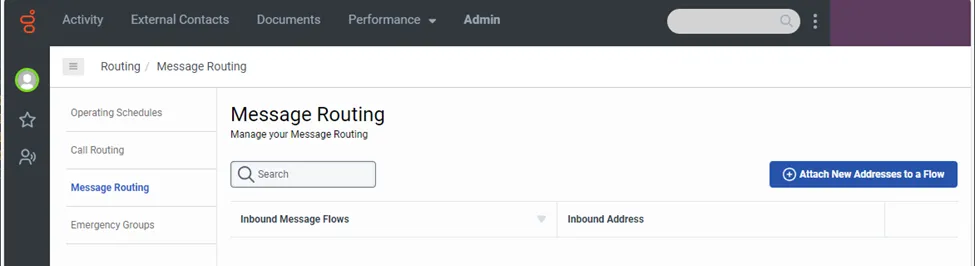
- Select the Test Flow and the Modica SMS address
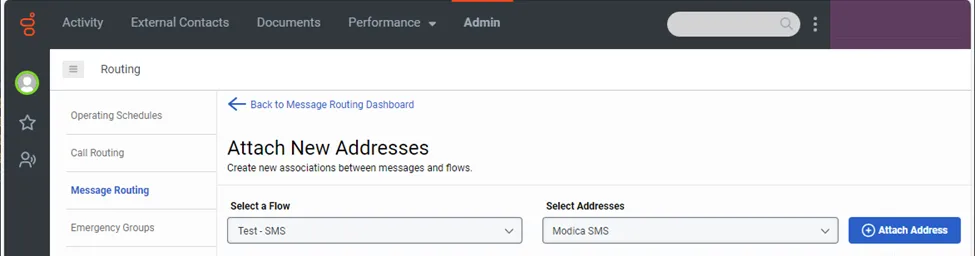
- Select the +Attach Address button to save
Next Steps
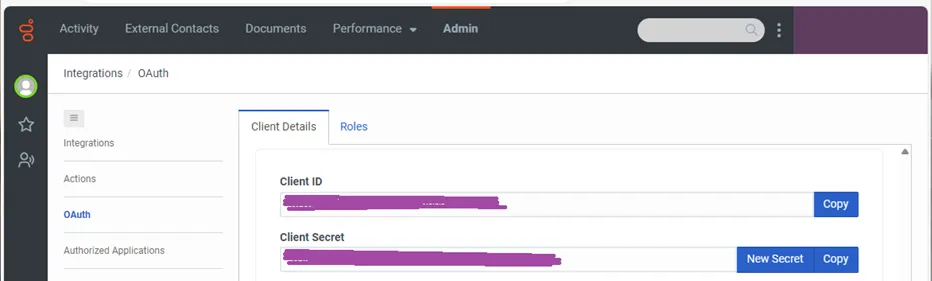
Supply cxlogiq with the following information via a secure method.
- orgName of the Genesys Org
From the OAuth:
- Client ID
- Client Secret
From the Integration:
- Outbound Notification Webhook URL
- Outbound Notification WebHook Signature Secret Token
- Integration Id